You can view your contact data within Horizon, however you may find it easier to receive survey results by email. This means you can receive survey results as soon as someone completes the survey. You could send the survey results directly to any email address, meaning you could send the data to another department, without the need for intervention.
How to create the email
Before creating your content, make sure you know what questions are asked in your survey or alternatively create a list you can refer to while creating this content.
- Click the 'Contacts' tab then Add new message content
-
Create new content as you wish
- For the subject line, use something that will help you identify the message. E.g. Someone has completed the Satisfaction survey, here are their results
- Create the content. Type into the message content what you want to display. E.g. Someone has completed this survey. Here are the results…
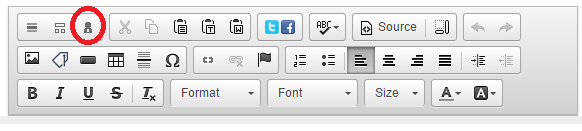
- You’ll need to use the smart insert to include your survey results. Click the smart insert icon in the editor toolbar
- The smart insert window will open
‘Contact’ should already be selected from the ‘Select group type’ dropdown. ‘General details’ will be selected from the ‘Select group’ dropdown. Here you can add in details such as the contacts first name. Press ‘Select’ next to the field you want to add. The window will close and you’ll return to your message. Within your content the smart insert will have appeared similar to %FIRSTNAME%
- You’ll need to click the ‘Smart insert’ icon again in the editor toolbar to add more smart inserts. To add any custom fields, select the ‘Select group’ dropdown and find your set of custom fields. If you want to add details such as email or telephone, select ‘Channels’ from the ‘Select group’ dropdown
- If you know what the smart insert text is, you can type this into the content e.g. if you know first name is %FIRSTNAME% just type it directly into the content
- Once you have added all your smart inserts, you’ll need to edit the smart inserts. Currently the smart inserts will get the contact details of the receiving recipient and not the person who completed the form. To change it to the person who completed form, you’ll need to add ‘FORM.’ Into each smart insert. This needs to be added after the first %. E.g. %FORM.FIRSTNAME%. Add this to all your smart inserts
- Save your message
How to create the survey results group
You can use any group type for the survey results group. If you wish to send the message to particular contacts, you’d be best creating a list group. See List groups: Created a fixed list of contacts
How to add the message and group to the survey
- Edit your survey, which you will find under Content > Publication content
- Ensure you are on the last page of form, where the contact submits the form
- Edit the form (by clicking the Form icon in the editor toolbar)
- Select the ‘Submit’ on the right-hand side so that it is highlighted
- On the left, the field properties window will appear
Clickbeside the ‘Notification’ box. Select your notification message. You will return to the web form creator window, with your message name in the ‘Notification’ box
- Click
beside the recipient’s box. Select your group.
- When you return to the web form creator window, click 'Apply' on the left-hand side, then click 'apply' at the bottom of the window. Save your content. You can now create the publication campaign and make it live.