A subscribe widget is a handy tool that will allow people to sign up to your newsletter. It is easy to setup and can be embedded into your website or blog.
Setting up a Subscribe Widget
- Click the ‘Settings’ button (in the top right corner)
- The ‘Subscriber actions’ page will load up. You’ll find a section ‘Subscribe Widget’. By default, there will be a ‘Subscribe Widget’ listed. You can edit this one by clicking the edit icon (the pencil to the right). Alternatively, click the ‘Add Widget’ option
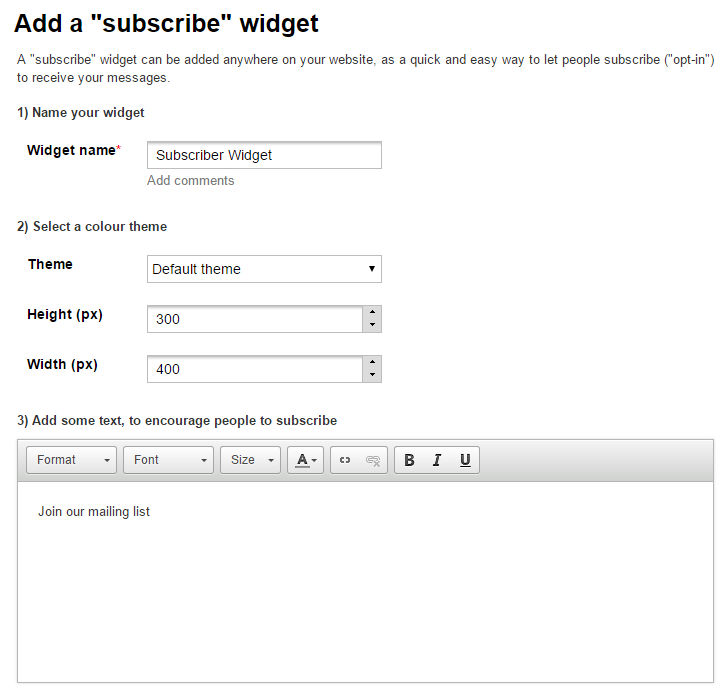
- Give your widget a name. This is for your own reference (e.g. Blog Subscribe Widget)
- Select a theme (the theme is the css code that controls default colours for text, buttons, among other things). If you would like a new theme for your widget, please get in touch.
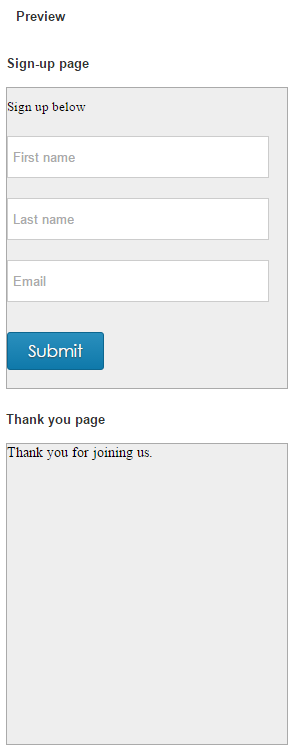
- Change the height and width of the widget if desired. The widget on the right hand side will update so that you can see the changes you have made. Note that the ‘Sign-up page’ and the ‘Thank you page’ use the same dimensions.
- Add some text to your widget. This text will be added above the subscribe form and can be used to encourage people to subscribe.
- You have the option to add the following form fields to your widget: First name, Last name, Email, Mobile and Telephone. Optionally, you can make the channels (Email, Mobile, Telephone) mandatory.
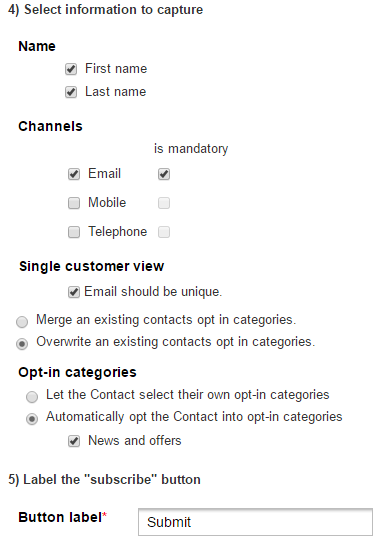
- If a customer’s email is already on the system, you can ensure that their contact record is updated. This ensures you don’t end up with duplicate records. To do this, tick ‘Email should be unique’. You can also choose whether to merge their opt-in categories or overwrite them.
- Choose whether the contact is automatically opted in (and select which opt in category) or whether they can choose. Please note that if you don’t show the customer the option to opt-in, ensure you have made it clear that they are signing up for your newsletter.
- Type some text for your button label or leave it as the default ‘Submit’
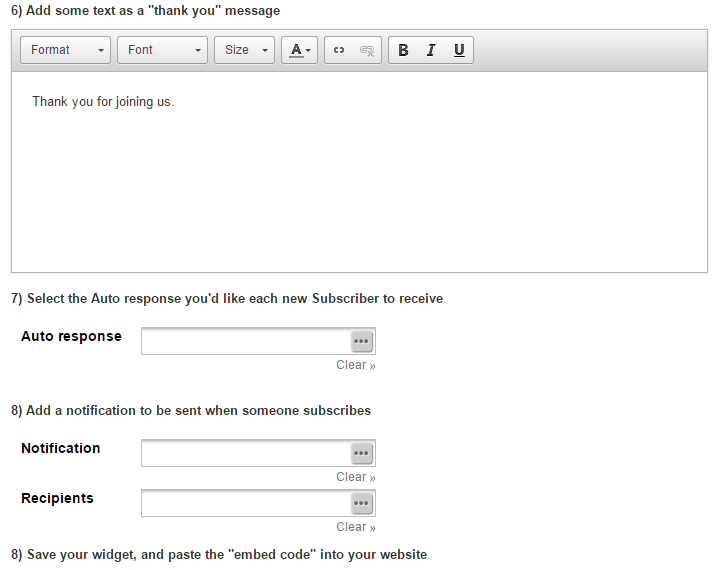
- Type some text for your “thank you” page
- You can select an auto response message the customer will receive once they have signed up. You will need to create a message within the content area first.
- You can select a notification message you will receive when someone completes the form. You will need to create this message beforehand, alongside a group to send the message to. This notification message will allow you to get an email as soon as someone signs up, alongside any other details you wish to add (e.g. the email could tell you the email and name of the contact). For more information on creating notification messages, see Creating notification messages in Horizon
- Click the green button ‘Save and get embed code’. Copy the embed code. Click ‘Close’, your subscribe widget will be saved and you’ll return to the subscriber actions page

- If you need to edit the widget, note that you will not need to update the embed code on your site